

My head is full and my heart is sad tonight. Thousands of WordPress users are left in a strange scenario today as Matt Mullenweg, Automattic’s CEO and founder, pulled access to the WordPress Repository for thousands of users on WPEngine.
WPEngine is officially cut off from all updates – plugins, themes, and core; anything that relies on the official WordPress.org servers is effectively severed. If you are a WPEngine client, this means you are theoretically at risk for security holes, and aren’t able to receive feature updates to plugins.
Update: As of Oct 1, WPEngine has restored access to the affected sites through secondary means. Still, the below tutorial is useful for people who may need to have a better option to update their sites in a more manual fashion.
Whether you are a hobbyist, an agency with clients, or a freelancer looking to support the users, it’s essential that you find a way to reconnect your site with the WordPress Repository in whatever way you can.
Luckily, there’s a few options:
WPengine: Manual, OR Update on Local
If you have a smaller site, or one that isn’t reliant on time-stamped transactions, the simple solution is to make updates locally. This can be done in one of two ways: manually, as per the tutorial on WPEngine’s site, or through Local. Local is WPEngine’s local development platform, and there are protocols included to sync up your production (live) site with a copy that lives on your local computer.
- Download Local for your operating system of choice (PC, Mac, Linux)
- In the left sidebar is a “Connect” feature… this will show you any sites you have in your WPEngine account.
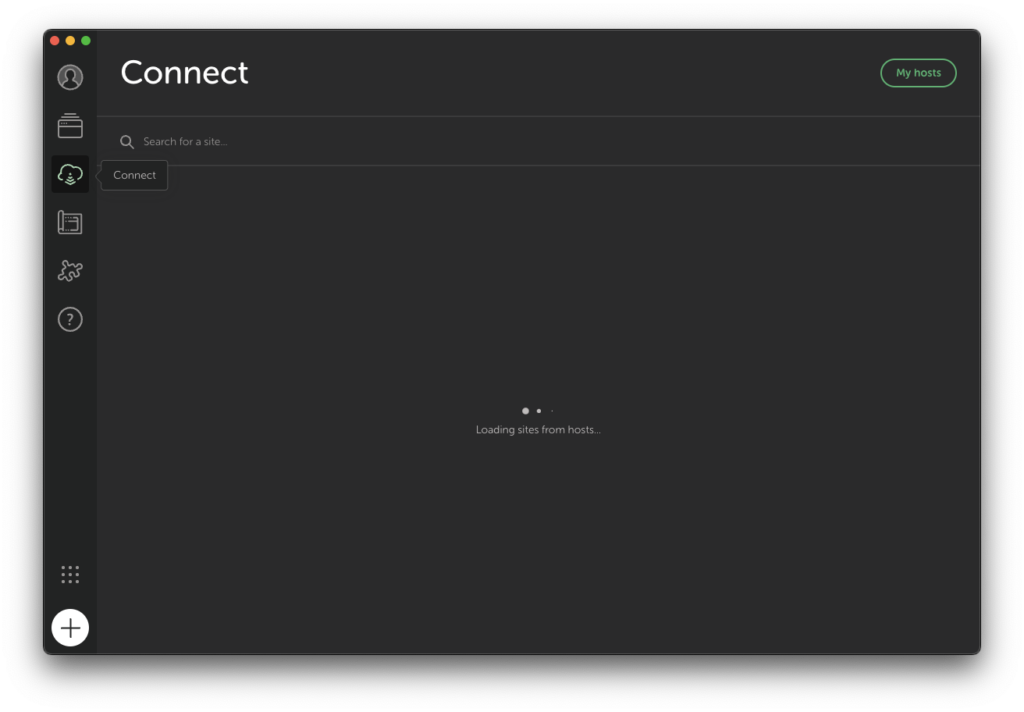
- In the left sidebar is a “Connect” feature… this will show you any sites you have in your WPEngine account. Click on the “Pull to Local” Button

- You will see a few options pop up. Feel free to use the default options, but the “Select Environment” should be set to (Prd) Production to grab your live site.

- Click (Connect & Pull Site). This will pull a copy of your production site locally.
- Once you’ve gotten confirmation the site has been pulled locally (you mayhave to authenticate with your OS that you want to make changes), you should be able to access your site through the Local interfact
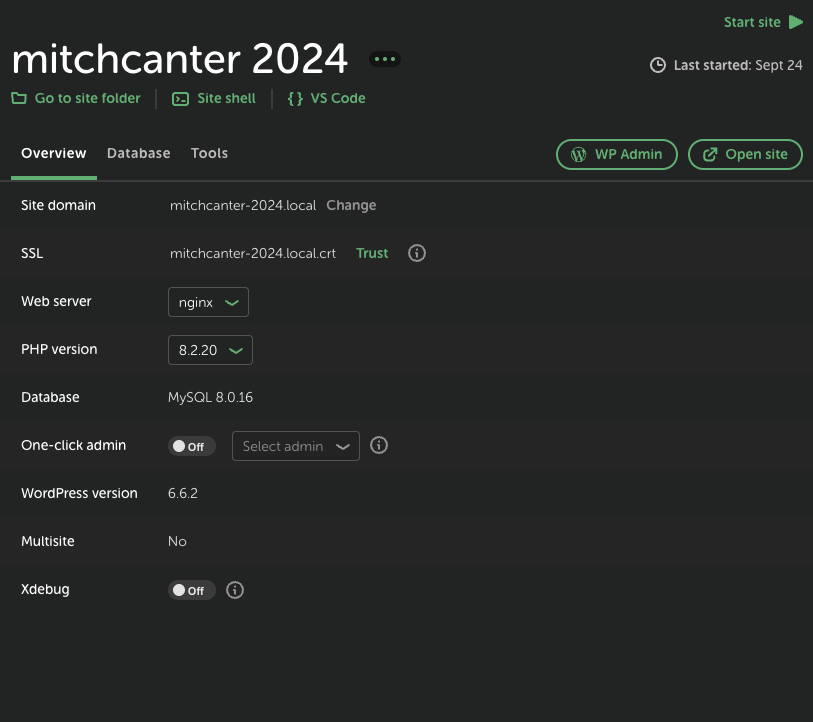
- Log in, and update your theme and plugins as per usual.
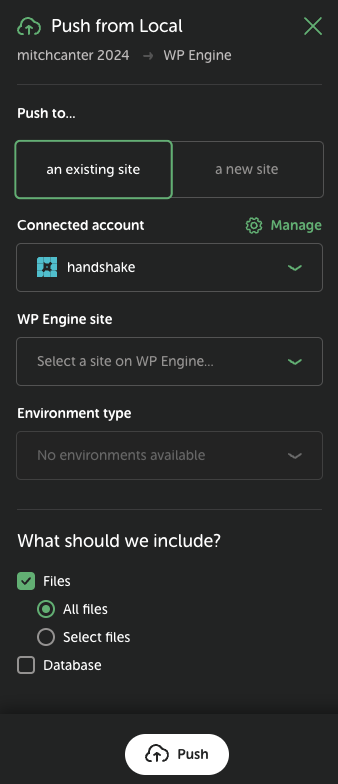
- Once everything is up to date, head back to Local and click “Push”. This will bring up a slew of options. Select your account, your site, and the Production Environment. You can choose whether or not to push the database with your files as well. Click the new (Push) button, and your updated plugins will be on their way to your Production WPEngine Site.
Caveat: if you run WordPress Multisite, the process is a bit more complicated and Local Connect won’t work. WPEngine reached out with some resources to help: https://localwp.com/help-docs/advanced/wordpress-multisite-with-local/#Deploying-a-Multisite-from-Local
A More Advanced Way: WPackagist and Composer
While the above tutorial will work for smaller sites – and, bonus – will give you a way to keep your site backed up if you pull the site regularly – developers with more complex workflows may want a different solution. This is especially true if you version control your code, and want more complete control over what’s actually happening.
Enter: Composer.
The easiest way to describe Composer, if you aren’t familiar, is that it’s a PHP-Dependency Package Manager. It’s a way to install modules, components, and other dependent technologies, and keep them up to date in a way that makes developing easier and more stable.
Whereas Packagist is the Composer package repository, WPackagist is a mirror of the WordPress repo, and allows you to instigate your plugins and themes in a composer.json file – a mapped schema of what packages you are working with.
Side note: you -will- need some Command Line skills to be able to use this.
Another side note: any theme that already uses composer can work with WPackagist out of the box, so if you have a development theme or core theme you maintain, consider adding this into your build step.
You’ll need to install Composer on your system to continue forward. On Mac, Homebrew is the easiest way to do this, but if you don’t use Homebrew (or you’re on a PC), you may want to visit https://getcomposer.org/download/ and grab the latest version there.
And now… onward!
- Navigate to your root project folder. For me, personally, I like to use
/wp-content/as my root folder. This gives me a few options:- Using WPackagist for my plugins
- Tracking my theme in Git for version control
- Tracking any non-WPackagist (re: Premium) plugins in my repo as well.
- Initiate your version control (
git init .) and set up your initial repo. - Create your first
composer.jsonfile. You’ll want this included at the minimum:
{
    "repositories":[
        {
            "type":"composer",
            "url":"https://wpackagist.org"
        }
    ]
}- This will initiate calls to the WPackagist repository for any added plugins.
- Next, add in your plugins and themes:
    "require": {
        "wpackagist-plugin/akismet":"dev-trunk",
        "wpackagist-plugin/wordpress-seo":">=7.0.2",
        "wpackagist-theme/hueman":"*"
}- You’ll notice a few things:
- The vendor prefixes:
wpackagist-pluginandwpackagist-themeare for plugins and themes, respectively - Plugins have a ‘trunk’ version that matches up with the version of the repository. Any plugin can be locked down to a specific version, a specific point release, or even auto updated on build. See the guide on Versions and Constraints from Composer.
- Themes do not have a trunk version, so all themes should be set to
"*".
- The vendor prefixes:
- Your final composer file may look something like this (feel free to fill in some of the gaps)
{
    "name": "prefix/site-title",
    "description": "My Awesome WordPress Site",
    "repositories":[
        {
            "type":"composer",
            "url":"https://wpackagist.org"
        }
    ],
    "require": {
        "wpackagist-plugin/akismet":"dev-trunk",
        "wpackagist-plugin/wordpress-seo":">=7.0.2",
        "wpackagist-theme/hueman":"*"
    },

}- Finally, run
composer installfrom your command line. This will run the build process, download and instigate any themes and plugins to their constrained versions, and will get you ready to rock and roll with any updates. - Now’s a good time to push your changes to Github/Bitbucket – commit early, commit often!
The fun part: since this is a universally recognized build script, this can be effortlessly slotted into many popular build-runtime sites. I like Buddy, personally – it’s like the IFTTT of CI/CD workflows.
My deployment looks like this:
- Run
composer updateto update my themes and plugins to their latest version - Commit any new plugin updates and changes – usually this is a version number increase, but it could be a substantial theme update as well
- Push to Github/Bitbucket
- Buddy is set up to listen for pushes to the
mainbranch of the repo, and ask if I want to make a deployment. - I manually start the deployment. This pulls a copy of the repository into Buddy and runs various checks (code linting, error checking, etc.)
- Once the checks are done, Composer will run, and on a successful build, will continue
- The files are then synced through SFTP or Rsync to their destination server of choice – and this is nice because this will work on ANY host with SFTP capabilities.
And that’s it. Even if your site on WPEngine, or any host, has been cut off from the main WordPress repository, there is still hope to get things updated and moving again.
As usual, I’ll be posting this to Twitter, so feel free to reach out if there’s any questions or comments on my build process or how it works.
